Isomeric Paper:

Sketching on Isomeric Paper:
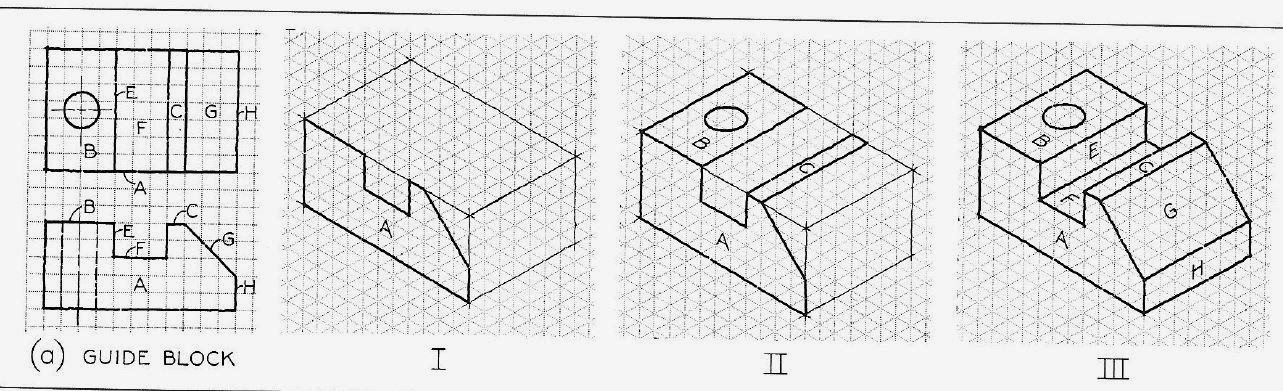
Sketching on Isomeric Paper:
I. Sketch enclosing box
Sketch front face "A"
II. Sketch receding lines parallel to one another.
III. Erase construction lines, make final lines heavy.
Oblique Sketching:

I. Block in front face
II. Add receding lines parallel to one another
III. Erase construction lines.
** put circular shapes on the front (undistorted) face in Oblique sketching.
Oblique sketching example #2:

Perspective Sketching:
True front face, distorted sides.
One-Point Perspective:

I. True front face
II. Receding lines to single point
III. Sketch object sides
IV. Erase construction lines.
Two-Point Perspective:
Use two points on a VP line (vanishing point)
Two-Point Perspective:
Use two points on a VP line (vanishing point)

Views of Object:

3 principle dimensions:
- Width
- Depth
- Height
Each view shows 2 dimensions:
Front/back view: Shows width and height.
Side views: Shows Depth and height
Top/bottom views: Show width and depth
Multiview Projection:
Rotate from top view, to front, to side.
Multiview Projection:
Rotate from top view, to front, to side.

The 6 views:

6 views

6 views:

"Plan" = top view
"Elevation" = views with height in it
Front view - front of object in operating condition
Choice of Views:
"necessary views" - minimum number of required views for complete description.

If both sides are the same, only show one of the sides.
Simple symmetrical objects
- use 3 views: top, front, and right side.
Complicated non-symmetrical objects
- use more than 3 views + partial views, and sectional views.
Necessary views:


Left side = right side? only draw right side.
Top vs. RH views? Choose which is better spaced on the paper.

One view drawing:

(a) 0.25mm thick
(b) left end is 65mm square, then 49.22 in diameter, 31.75 in diameter, 20mm diameter.
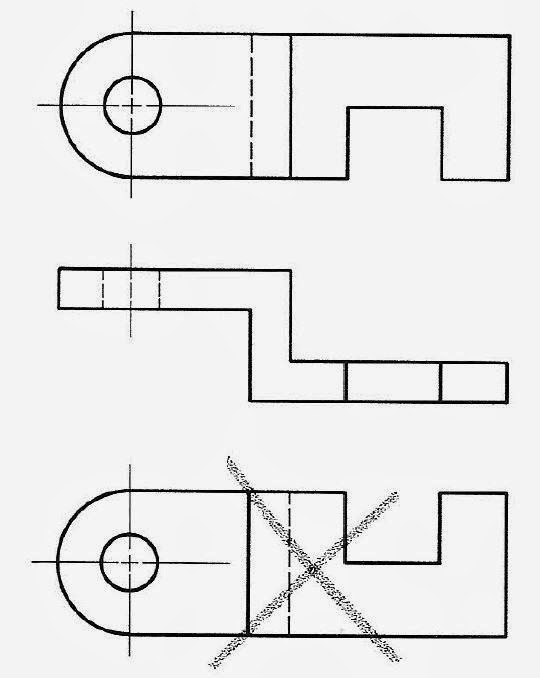
Hidden Lines:
(b) left end is 65mm square, then 49.22 in diameter, 31.75 in diameter, 20mm diameter.
Hidden Lines:

a) leave a gap whenever a hidden line forms a continuation of a visible line (otherwise you don't know where the hidden line starts, and the visible line ends)
b) Hidden lines should intersect to form "L" and "T" corners.
d) stagger hidden lines, as in brick laying.
e) hidden lines should join together at corners.
f) join corners
g) don't extend visible lines.
Center Lines: start and end with long dashes
leave a gap when center line runs into a visible or hidden line
thinner than visible lines, thick enough to copy
use for dimensioning

Two Views:

I. Block in rectangles, center on page (A=A, B=B)
II. Line up height and width
III. Erase construction lines, darken final lines
Three Views:
III. Erase construction lines, darken final lines
Three Views:

I. Block in rectangles for three views: Top, front, side.
II. Lightly block in and line up details.
V. Erase construction lines, make final lines bold.
Alignment of Views:
II. Lightly block in and line up details.
V. Erase construction lines, make final lines bold.
Alignment of Views:

American national standard arrangement: Top, front, side.
Top above front, right side to the right of the front.
Meaning of Lines:
Top above front, right side to the right of the front.
Meaning of Lines:
1) Intersection of two surfaces
2) edge view of a surface
4) contour view of curved surface. * no shading is used in a working drawing - compare different views to determine the meaning of a line.

Precedence of Lines:
Visible lines cover center and hidden lines
Hidden lines cover center lines


HW: Create the Top-Front-Side views for:
pg 57, 61, 65, 75, 77
** Do not rip the pages out of your book, raise your hand, and I will come around and check you off.
1 pnt. / per line
use dashed lines for hidden lines
2 pts. - Use block lettering to add dimensions
pg 57:

pg 61:

pg 65:

Pg 75:
pg 77:
pg 77:

Fill in the missing lines, and sketch the 3D view of pg 67 and 69.
To sketch the 3D view, start with lightly drawing a block: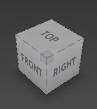

Lightly sketch the front, right, and top views onto your block
Erase your construction lines, darken in actual lines of object.
pg 67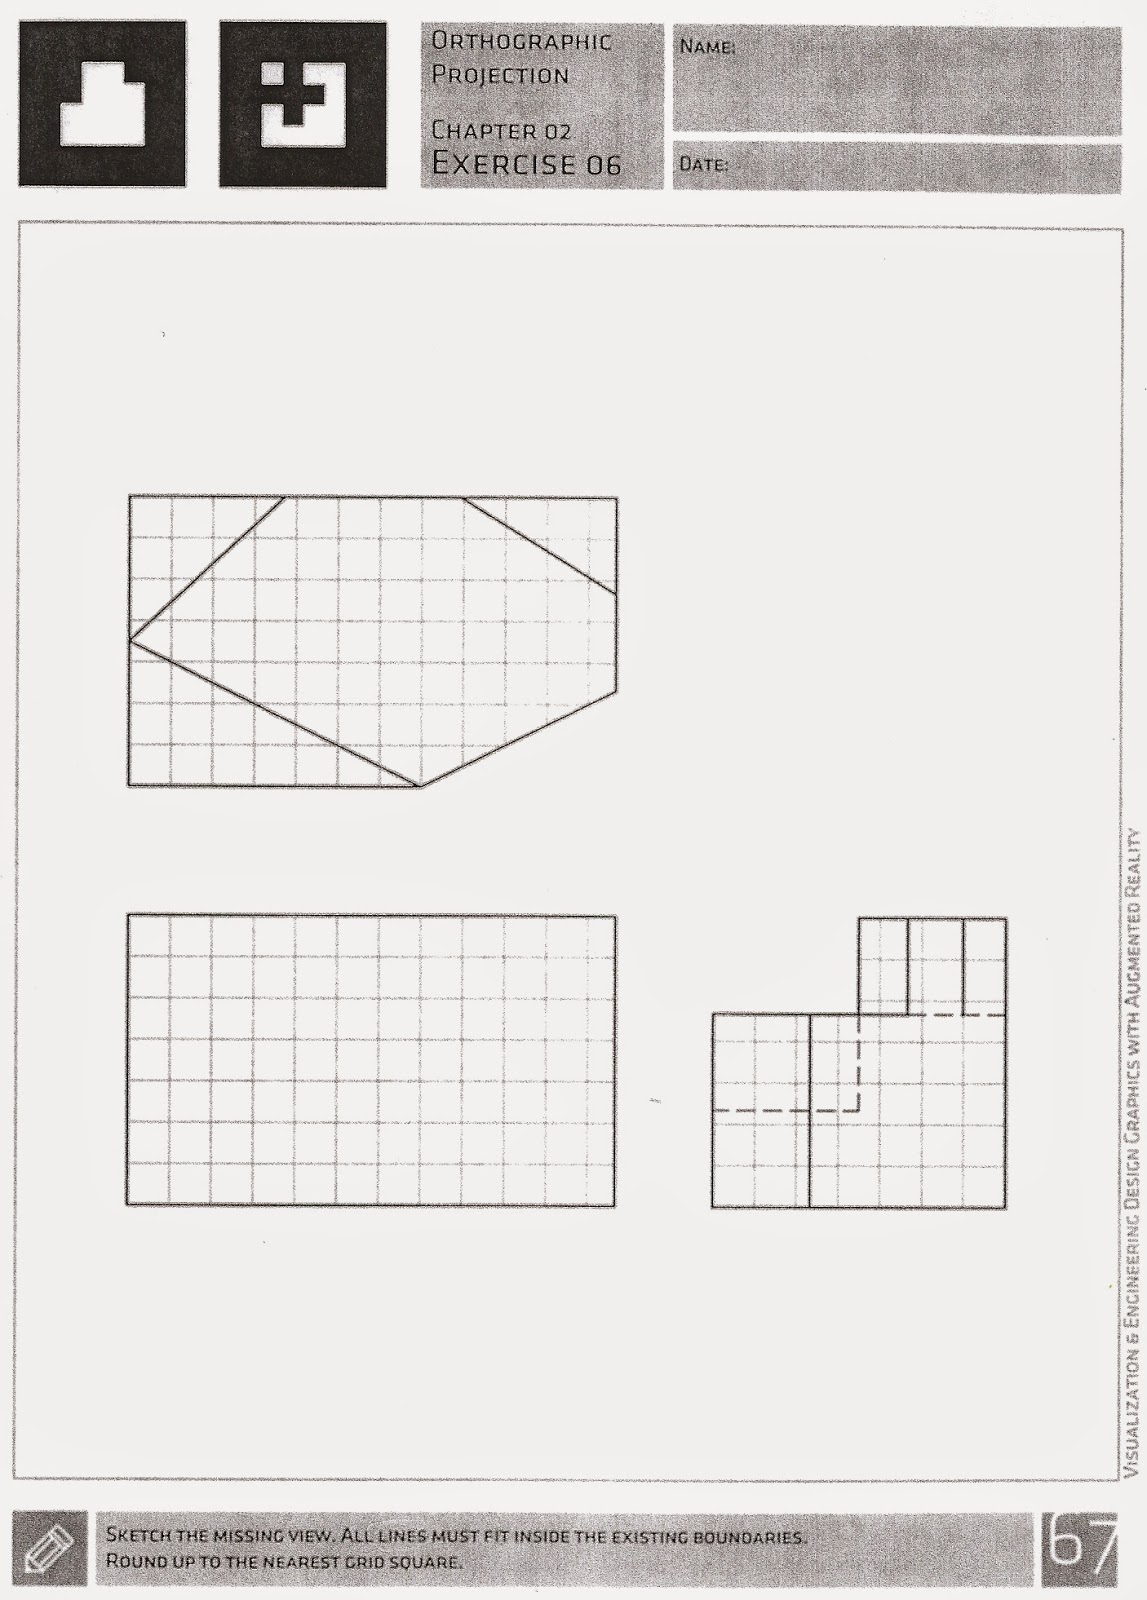
pg 69:
To sketch the 3D view, start with lightly drawing a block:
Lightly sketch the front, right, and top views onto your block
Erase your construction lines, darken in actual lines of object.
pg 67
pg 69:
Practice for test:


On a blank piece of paper:
- Sketch out margins, and block in equally spaced and aligned rectangles for views.
- Fill in the top, front, and side views with dark lines
- Fill in dimensions
- Create a 3D view in the upper right hand corner.
(All holes are through holes)
(All holes are through holes)

Sketch the isomeric 3D projection of each of the below objects. Try to visualize it before you draw it!
