Cutting plane:
- Depends on shape of object
- Usually parallel to one of the orthographic planes
- Often along a centerline
- Linetype for cutting plane:
↓ ↓
A A
- Cutting lines take precedence over other lines
- Arrows at the end indicate which part of object was removed
- Labeled with letters at both ends
Rules for Sectioning:
- Omit hidden lines in sectional views
- Cut surfaces are shaded or "hatched"
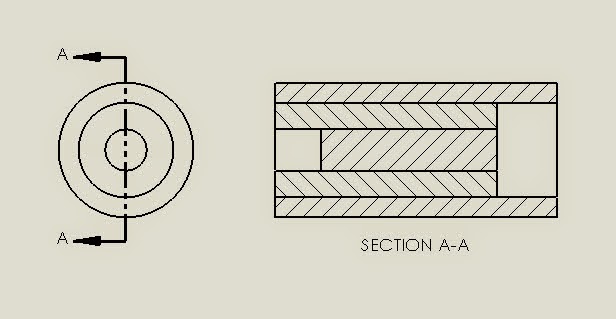
ANSI standards for hatch patterns:

Typically Hatch patterns are:
- parallel
- properly spaced
- oriented at an angle that is not parallel or perpendicular to the object (30°, 45°, or 60°)
- slightly thinner lines than object lines
- Adjacent components hatched at different angles
"Full" Cross-Sectional View:
Plane that cuts vertically through the center of the bloc:


Half-Section
(Half of a full section = 1/4 cut away)
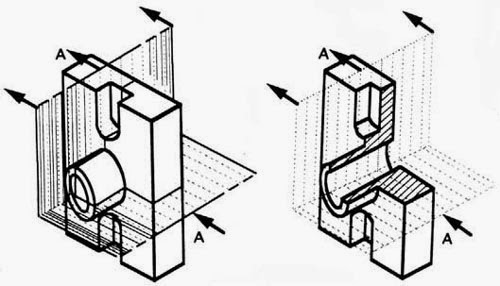
Sectioning Objects with Holes, Ribs, Etc.
The cross-section on the right of figure 22 is technically correct. However, the convention in a drawing is to show the view on the left as the preferred method for sectioning this type of object.
Offset Section:
For objects whose features do not all lie along center line

Revolved sectional view:

Sectional Views usually replace one of the views in an orthographic drawing

~~~~~~~~~~~~~~~~~~~~~~~~~~~~~~~~~~~~~~~~~~~
Spend a few moments skimming through all of the examples in chapter 4!!
Let's play around with the tools in the layout menu.
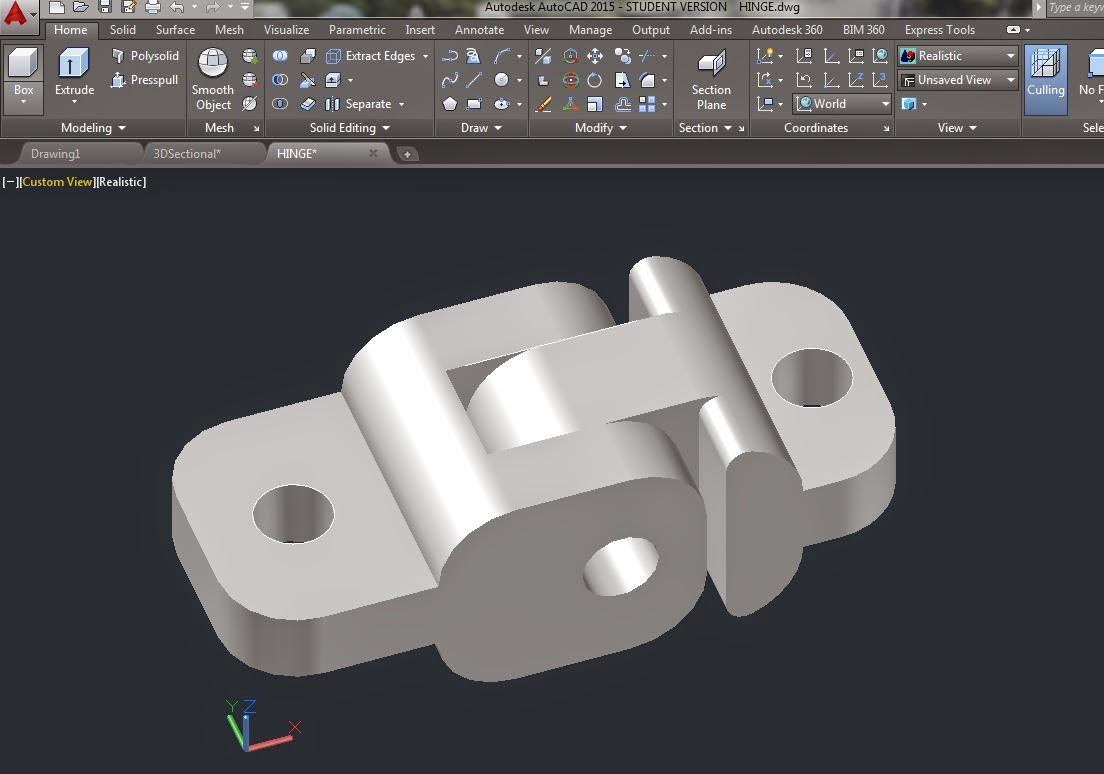
First, create a hinge. You can decide on your own dimensions, just make it symmetrical, and create two interlocking pieces.

Remember to save your work often!!

Create full sectional views, snap to the center of your objects!

Change font size etc. by selecting object, right click → properties,
Next, add a viewport (just type "VIEWPORT" into the command line → single) to show the isometric view in the upper right hand corner.

Add dimensions:
Annotate →Dimline, etc.

In another layout, explore the "Detail" views. "detail" is in the ribbon in the Layout tab, right next to sectional views. Start with viewbase again, and then select rectangular or circular portions to create a detailed view.
Next, go through different styles:
Layout →Section view style, and detail view style

Open up the menu, hit "modify" and check out everything that is in it. Change your font styles, arrow styles and colors, etc.

Click the "..." next to hatch patterns to see what they all look like, and change your hatch pattern.

There are many different hatch patterns, select a few different ones, and see the previews of your selection.

~~~~~~~~~~~~~~~~~~~~~~~~~~~~~~~~~~~~~~~~~~~~~~~~~~
Create the sectional views on pg 161, 165, 167, 169, and 179 in your book. Raise your hand and let me check you off when you are done!
~~~~~~~~~~~~~~~~~~~~~~~~~~~~~~~~~~~~~~~~~~~~~~~~~~~
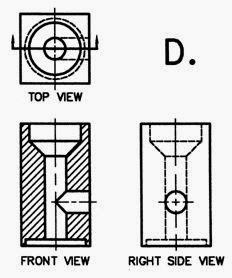
Cube quiz practice:
- Create a 3 by 3 by 3 cube
- Draw 1 by 1 squares on each of the faces that you can push pull
- Save your rubbix cube under multiple names, this will be the base for all of your practice cubes.
- Attempt to push and pull the squares to match the below views.
Base cube:

Create and format your layout, create top, front, right viewbase, then open up a large VIEWPORT next to your layout. Change to model space. This will let you work on your cube, and watch the changes in your views as you change it.
Notice the small squares do not show up on the layout, only the solid shows up.

Save multiple copies of this setup:

Now, open up one of your cubes, and start Presspulling! "Shades of Gray" might be the best way to view it in the viewport.
Note: Switch back and forth between paper space and model space to update the viewbase views.

Now that you are all set up, try and Pushpull to create the 3D object from the below views. Answers are below, but try to figure it out without looking!!!
~~~~~~~~~~~~~~~~~~~~~~~~~~~~~~~~~~~~~~~~~~~~~~~~~~~

~~~~~~~~~~~~~~~~~~~~~~~~~~~~~~~~~~~~~~~~~~~~~~~~~~~

~~~~~~~~~~~~~~~~~~~~~~~~~~~~~~~~~~~~~~~~~~~~~~~~~~~

~~~~~~~~~~~~~~~~~~~~~~~~~~~~~~~~~~~~~~~~~~~~~~~~~~~

~~~~~~~~~~~~~~~~~~~~~~~~~~~~~~~~~~~~~~~~~~~~~~~~~~~
 ~~~~~~~~~~~~~~~~~~~~~~~~~~~~~~~~~~~~~~~~~~~~~~~~~~~
~~~~~~~~~~~~~~~~~~~~~~~~~~~~~~~~~~~~~~~~~~~~~~~~~~~
Answers
~~~~~~~~~~~~~~~~~~~~~~~~~~~~~~~~~~~~~~~~~~~~~~~~~~~


Another view...


No comments:
Post a Comment