https://www.youtube.com/watch?v=9d0PA07nZlI
You do not need to use the exact dimensions, just play around with it, create something with the main idea.
Create profile, then use the revolve command.


Create cross section:


CAD / Inventor Assembly
Make a complete set of working drawings for a simple assembly in either Inventor or AutoCAD. Your set of working drawings should have:
a) An exploded assembly drawing with a parts list, balloons with leader lines.
b) Individual parts with dimensions and tolerances labeled.

Make a birdhouse similar to the one on pg 343-346
Note: Just "similar", it doesn't have to be exact - change it to use the same size screws through the entire project so you don't have to worry about different hole sizes etc.

(I made everything out of different types of wood etc. so you could more easily see the different parts)


Example hinge:

Pages out of book:


Use "Project Geometry" to line up the holes for the screws.


Put all of your parts together in an assembly, then save and close all of your parts.
Double click on one of the parts in your assembly, then open up the sketch of that part from the modeling window (double click on the sketch you want to edit)
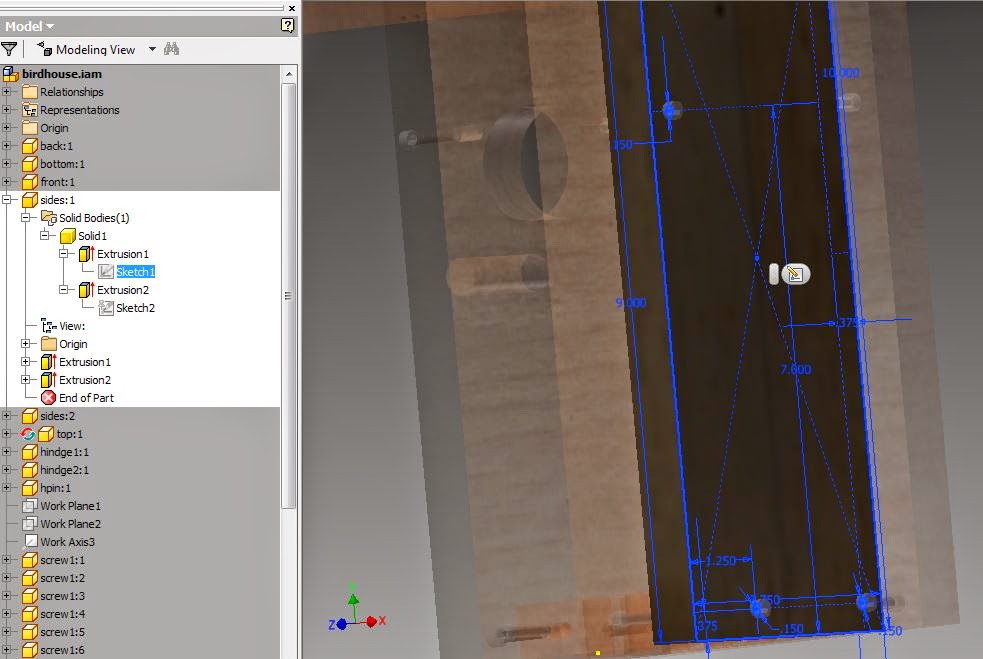
Choose "Project Geometry" from your sketching tools, then click on the holes in other parts, and project them onto the sketching plane for the part you are working on.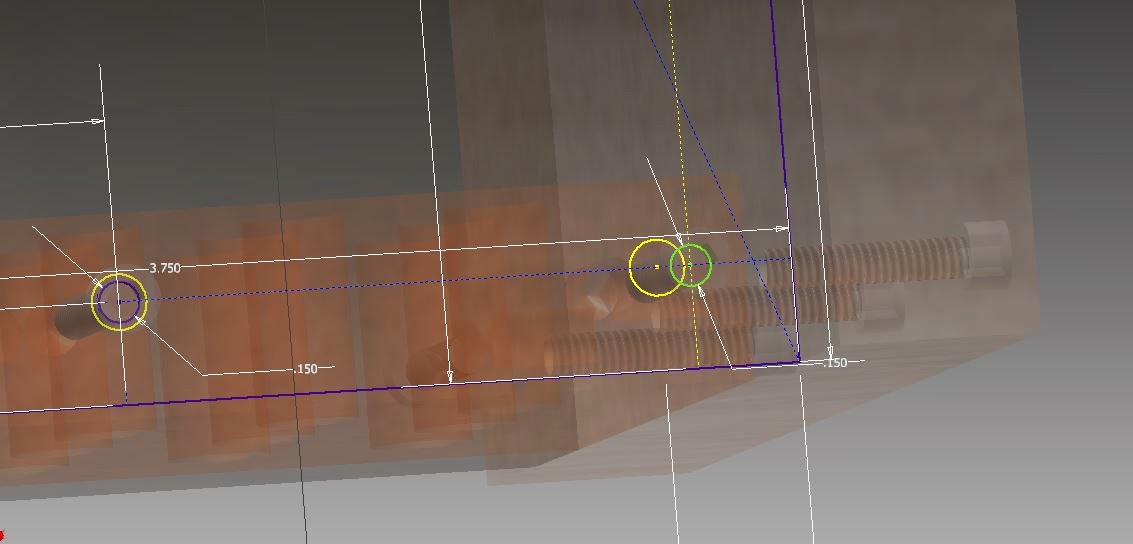
Move the hole from your sketches to line up with one another (note - you might have to turn off some of your constraints, or use the move command to do this)
Then "Finish Sketch" and "Return" to get back to where you were.
Save
Making an exploded view in Inventor:
1. Assemble all of your parts so that they are all fully constrained.
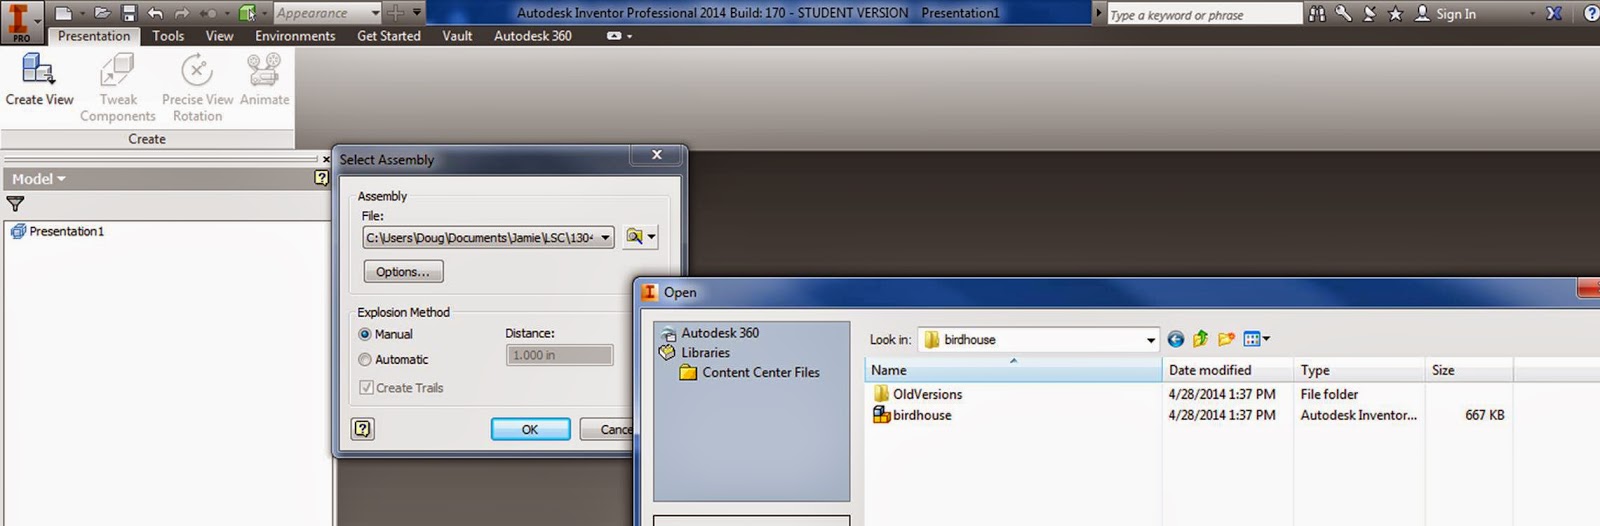
2. New → Presentation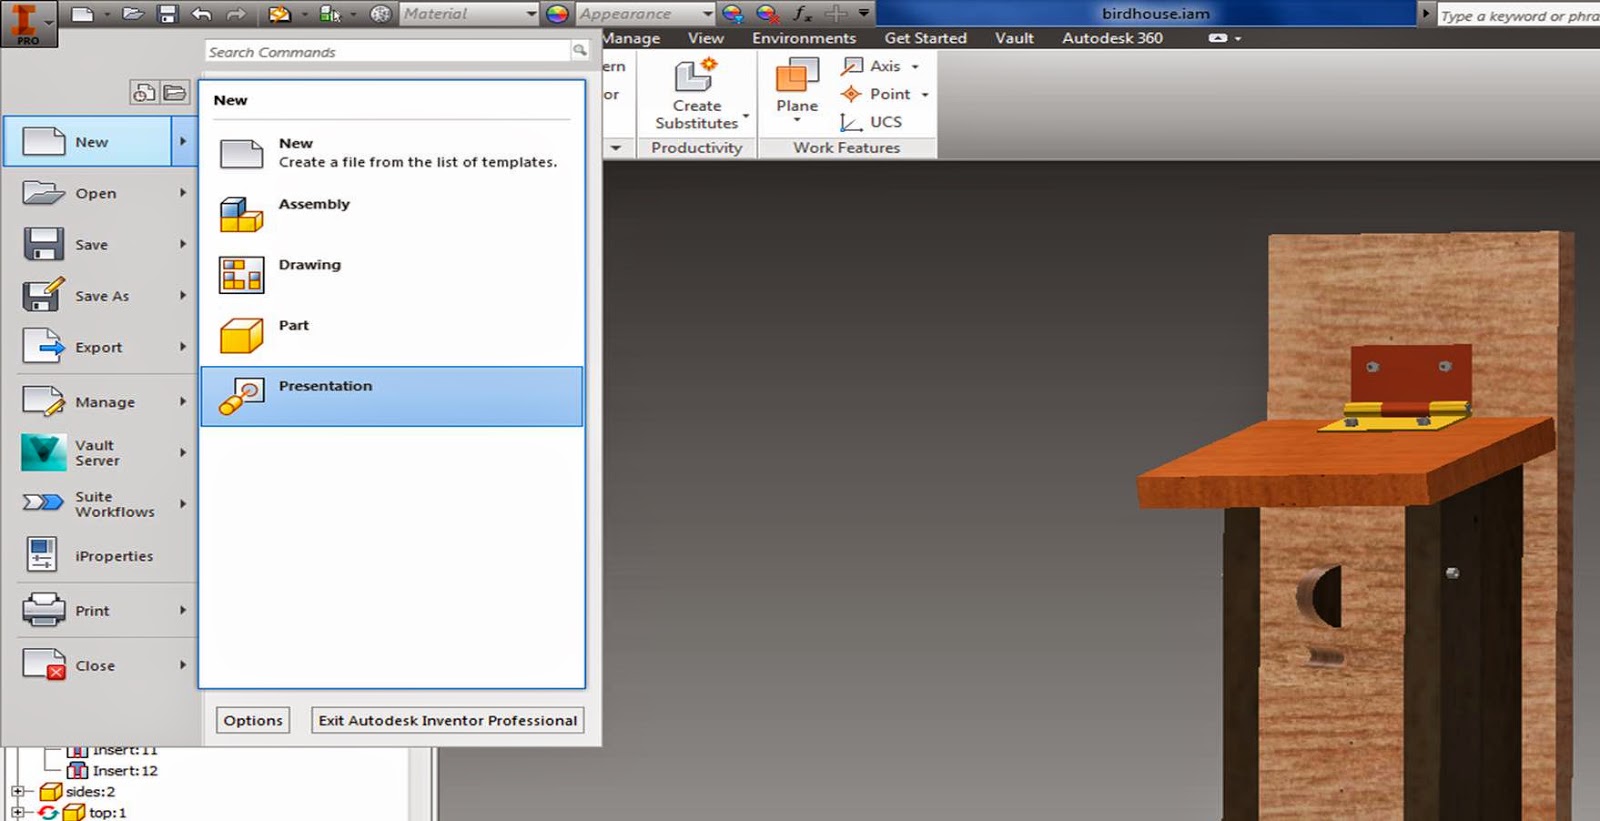
3. Create View → open up your assembly file (click on the little folder on the right hand side of your file) → openDouble click on one of the parts in your assembly, then open up the sketch of that part from the modeling window (double click on the sketch you want to edit)
Choose "Project Geometry" from your sketching tools, then click on the holes in other parts, and project them onto the sketching plane for the part you are working on.
Move the hole from your sketches to line up with one another (note - you might have to turn off some of your constraints, or use the move command to do this)
Then "Finish Sketch" and "Return" to get back to where you were.
Save
Making an exploded view in Inventor:
1. Assemble all of your parts so that they are all fully constrained.
2. New → Presentation
4. You can try to automatically explode it, but this does not always work out so well (especially when you have a lot of parts).... so select "Manual".

5. Tweak Components →Components →choose a part → Direction →click on a face and a direction, grab and pull it away, create a trail →"close" when you are done.
Note: You can select more than one component at a time, so you can move screws together etc. and you can also move in one direction, then click "x , y, or z", and move in another direction before closing.


6. Click "animate" to see your components coming exploding or coming together, then save it.
7. Create a set of working drawings:
Set up your sheets: - link
Open up multiple sheets:
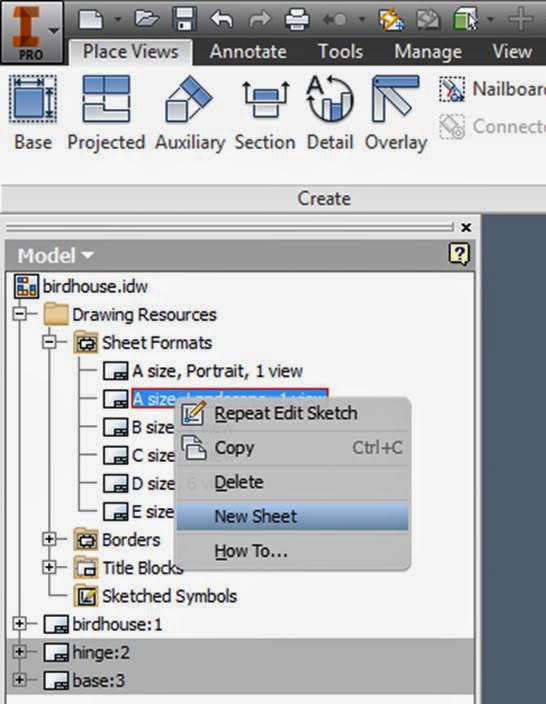
Sheet Format → Choose a size →right click, New Sheet
Create all of the diagrams that you need to,
8. Create a Parts list, Balloons, and a PDF etc. for your exploded view:
In your new blank sheet:
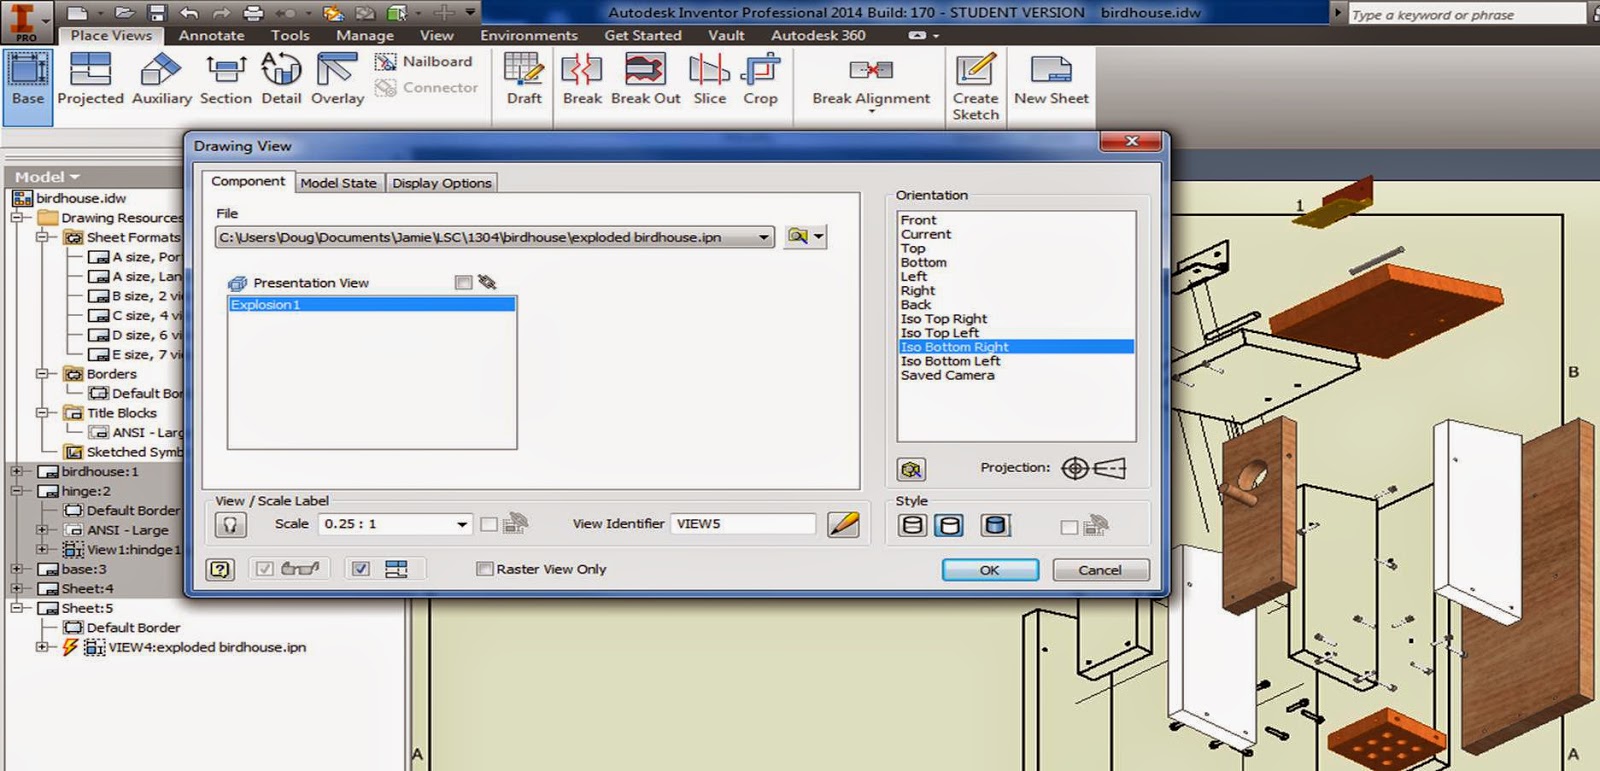
Base view → File (click the magnifying glass, and find your ipn exploded view → change the scale, change the view orientation.

Create a Parts list:
Annotate → Parts List
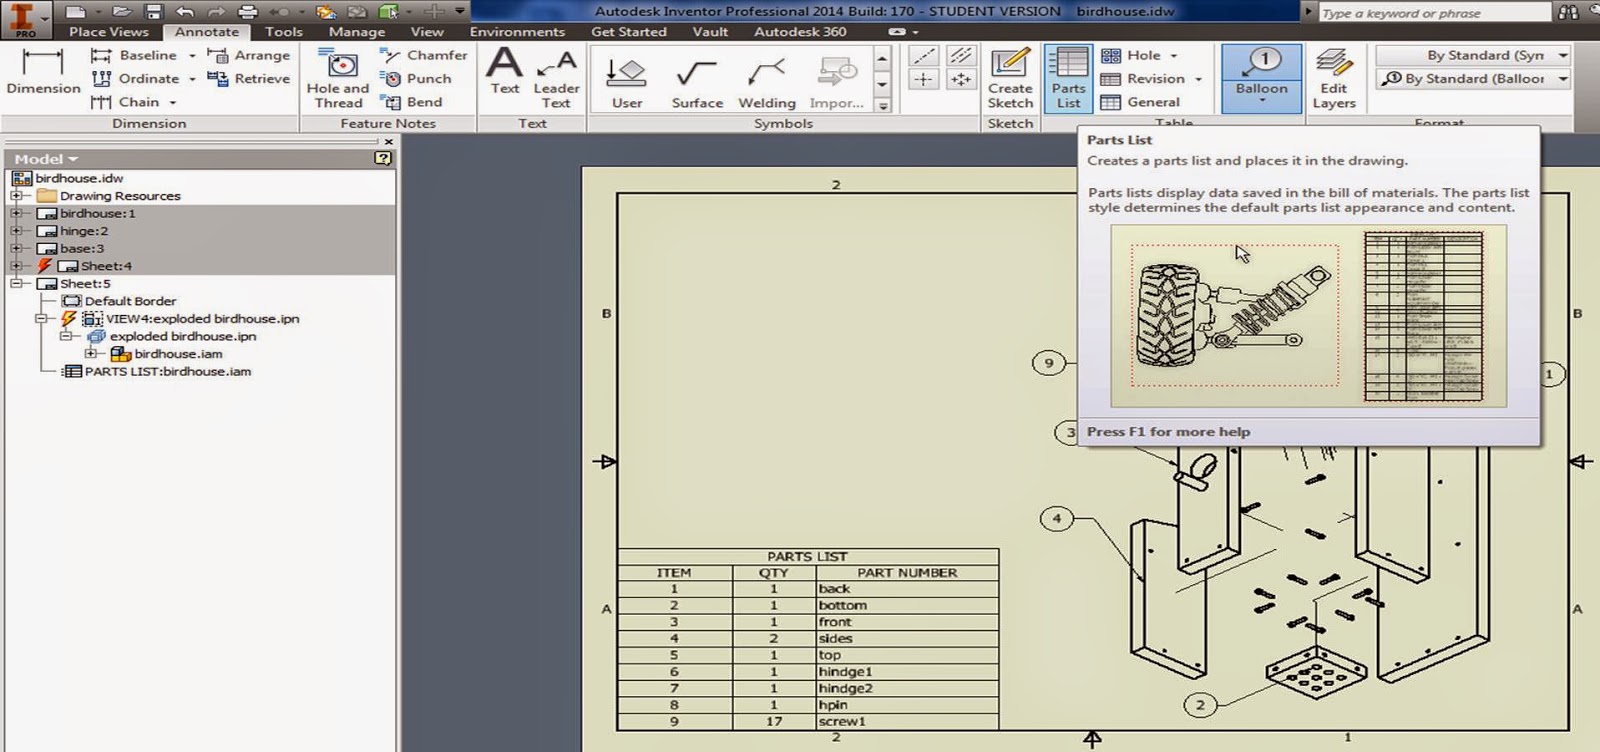
Click your parts list onto the page.
Right click on it to→ "edit parts list" to change what columns and info it shows:
The upper left hand icon lets you add or remove properties to your parts list:

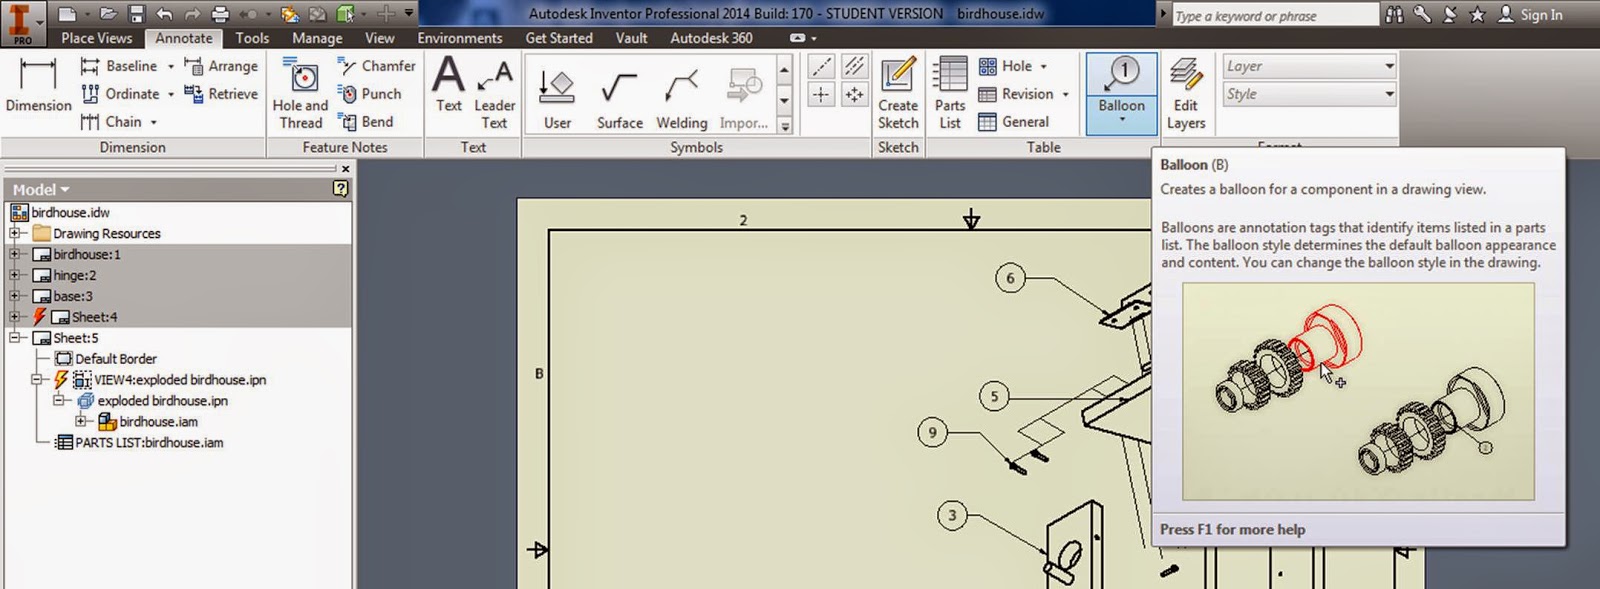
Then add your bubble part numbers:
It will automatically insert the correct number when you click on a part.
Youtubes going through working drawings in Inventor:
https://www.youtube.com/watch?v=XO2lE9zmhRU
https://www.youtube.com/watch?v=NBQXzL2tOGQ#t=39
No comments:
Post a Comment